Quickstart
Lexy is a data framework for building AI-powered applications. It provides a simple API to store and retrieve documents, and to apply transformations to those documents.
Follow the instructions in the installation guide to install Lexy.
Concepts
Lexy has the following core concepts:
- Collections: A collection is a group of documents.
- Documents: A document consists of content (text, image, file, etc.) and metadata.
- Transformers: A transformer is a function that takes a document as input and returns a transformed version of that document.
- Indexes: An index is used to store and retrieve the output of transformed documents, including embeddings.
- Bindings: A binding is a connection between a collection, a transformer, and an index. When a document is added to a collection, the transformer is applied to the document, and the result is stored in the index.
For an overview of Lexy's core concepts, see the Getting started tutorial.
Building with Lexy
Project structure
Here's a sample directory structure for a project using Lexy:
my-project
├── mypkg
│   └── src
├── pipelines  # Lexy pipelines (1)
│   ├── __init__.py
│   ├── code.py
│   ├── my_custom_transformer.py
│   ├── my_first_pipeline.py
│   ├── pdf_embeddings.py
│   └── requirements.txt  # (2)!
├── .env
└── docker-compose.yaml  # (3)!
- This is the Lexy pipelines directory, defined by the environment variable
PIPELINE_DIR. The modules in this directory are imported and run by thelexyworkercontainer. - Extra requirements for your pipelines or custom transformers. These packages will
be installed whenever you restart the
lexyworkercontainer. - You can generate this file using the Lexy CLI. Run
lexy dockeron the command line to create a sample compose file.
Pipelines
Lexy uses a pipelines directory to load your pipelines and custom transformers. This directory
defaults to ./pipelines but can be set using the PIPELINE_DIR environment variable in your .env file.
You can install custom packages required for your pipelines or transformers in requirements.txt.
These packages will be installed in the lexyworker container.
Example pipelines directory
import tree_sitter_languages

from lexy.models import Document
from lexy.transformers import lexy_transformer


def parse_code(content):
    # just an example - replace with your own logic
    return [
        {'text': 'my comment', 'line_no': 1, 'filename': 'example.py'}
    ]


@lexy_transformer(name='code.extract_comments.v1')
def get_comments(doc: Document) -> list[dict]:
    comments = []
    for c in parse_code(doc.content):
        comments.append({
            'comment_text': c['text'],
            'comment_meta': {
                'line_no': c['line_no'],
                'filename': c['filename']
            }
        })
    return comments
from io import BytesIO

import httpx
import pypdf

from lexy.models import Document
from lexy.transformers import lexy_transformer
from lexy.transformers.embeddings import text_embeddings


def pdf_reader_from_url(url: str) -> pypdf.PdfReader:
    response = httpx.get(url)
    return pypdf.PdfReader(BytesIO(response.content))


@lexy_transformer(name='pdf.embed_pages.text_only')
def embed_pdf_pages(doc: Document) -> list[dict]:

    pdf = pdf_reader_from_url(doc.object_url)
    pages = []

    for page_num, page in enumerate(pdf.pages):
        page_text = page.extract_text()
        images = [im.name for im in page.images]
        p = {
            'page_text': page_text,
            'page_text_embedding': text_embeddings(page_text),
            'page_meta': {
                'page_num': page_num,
                'page_text_length': len(page_text),
                'images': images,
                'n_images': len(images)
            }
        }
        pages.append(p)

    return pages
Configuration
You can build and run Lexy using Docker Compose.
Here is an example of docker-compose.yaml and a .env file for a project using Lexy with Google Cloud Storage as the
default storage service.
The example below uses the latest tag, which you can replace with a specific version if needed (e.g., v0.0.2).
Images are built for each release and hosted on GitHub Container Registry.
Available packages are here.
Tip
You can generate the docker-compose.yaml file below using the Lexy CLI. Run lexy docker on the command line
to create the file.
Example configuration using Google Cloud Storage
name: my-project

services:
  lexyserver:
    image: ghcr.io/lexy-ai/lexy/lx-server:latest
    hostname: lexy_server
    depends_on:
      - db_postgres
    ports:
      - "9900:9900"
    env_file:
      - .env
    environment:
      - OPENAI_API_KEY=${OPENAI_API_KEY}
      - PIPELINE_DIR=/home/app/pipelines
      - GOOGLE_APPLICATION_CREDENTIALS=/run/secrets/gcp_credentials
    volumes:
      - ${PIPELINE_DIR:-./pipelines}:/home/app/pipelines
    secrets:
      - gcp_credentials

  lexyworker:
    image: ghcr.io/lexy-ai/lexy/lx-worker:latest
    hostname: celeryworker
    depends_on:
      - lexyserver
      - queue
    restart: always
    env_file:
      - .env
    environment:
      - PIPELINE_DIR=/home/app/pipelines
    volumes:
      - ${PIPELINE_DIR:-./pipelines}:/home/app/pipelines

  db_postgres:
    image: ghcr.io/lexy-ai/lexy/lx-postgres:latest
    restart: always
    ports:
      - "5432:5432"
    volumes:
      - db-postgres:/var/lib/postgresql/data

  queue:
    image: rabbitmq:3.9.10-management
    restart: always
    ports:
      - "5672:5672"
      - "15672:15672"

  flower:
    image: mher/flower
    restart: always
    ports:
      - "5556:5555"
    command: celery --broker=amqp://guest:guest@queue:5672// flower -A lexy.main.celery --broker_api=http://guest:guest@queue:15672/api/vhost
    depends_on:
      - lexyserver
      - lexyworker
      - queue
    environment:
      - CELERY_BROKER_URL=amqp://guest:guest@queue:5672//
      - CELERY_RESULT_BACKEND=db+postgresql://postgres:postgres@db_postgres/lexy
      - CELERY_BROKER_API_URL=http://guest:guest@queue:15672/api/vhost
      - C_FORCE_ROOT=true
      - FLOWER_UNAUTHENTICATED_API=true

volumes:
  db-postgres:
    driver: local

secrets:
  gcp_credentials:
    file: ${GOOGLE_APPLICATION_CREDENTIALS:-/dev/null}

networks:
  default:
    name: lexy-net
    external: false
Testing
You can run tests inside the lexyserver container to ensure that Lexy is working as expected.
In the example project above, you first bring up your project's stack using Docker Compose:
Then use the following commands to run tests inside the running lexyserver container:
docker compose exec -it lexyserver pytest lexy_tests
docker compose exec -it lexyserver pytest sdk-python
Or to run tests in a single command:
If instead you want to run tests inside a new lexyserver container, use the following command:
Lexy API
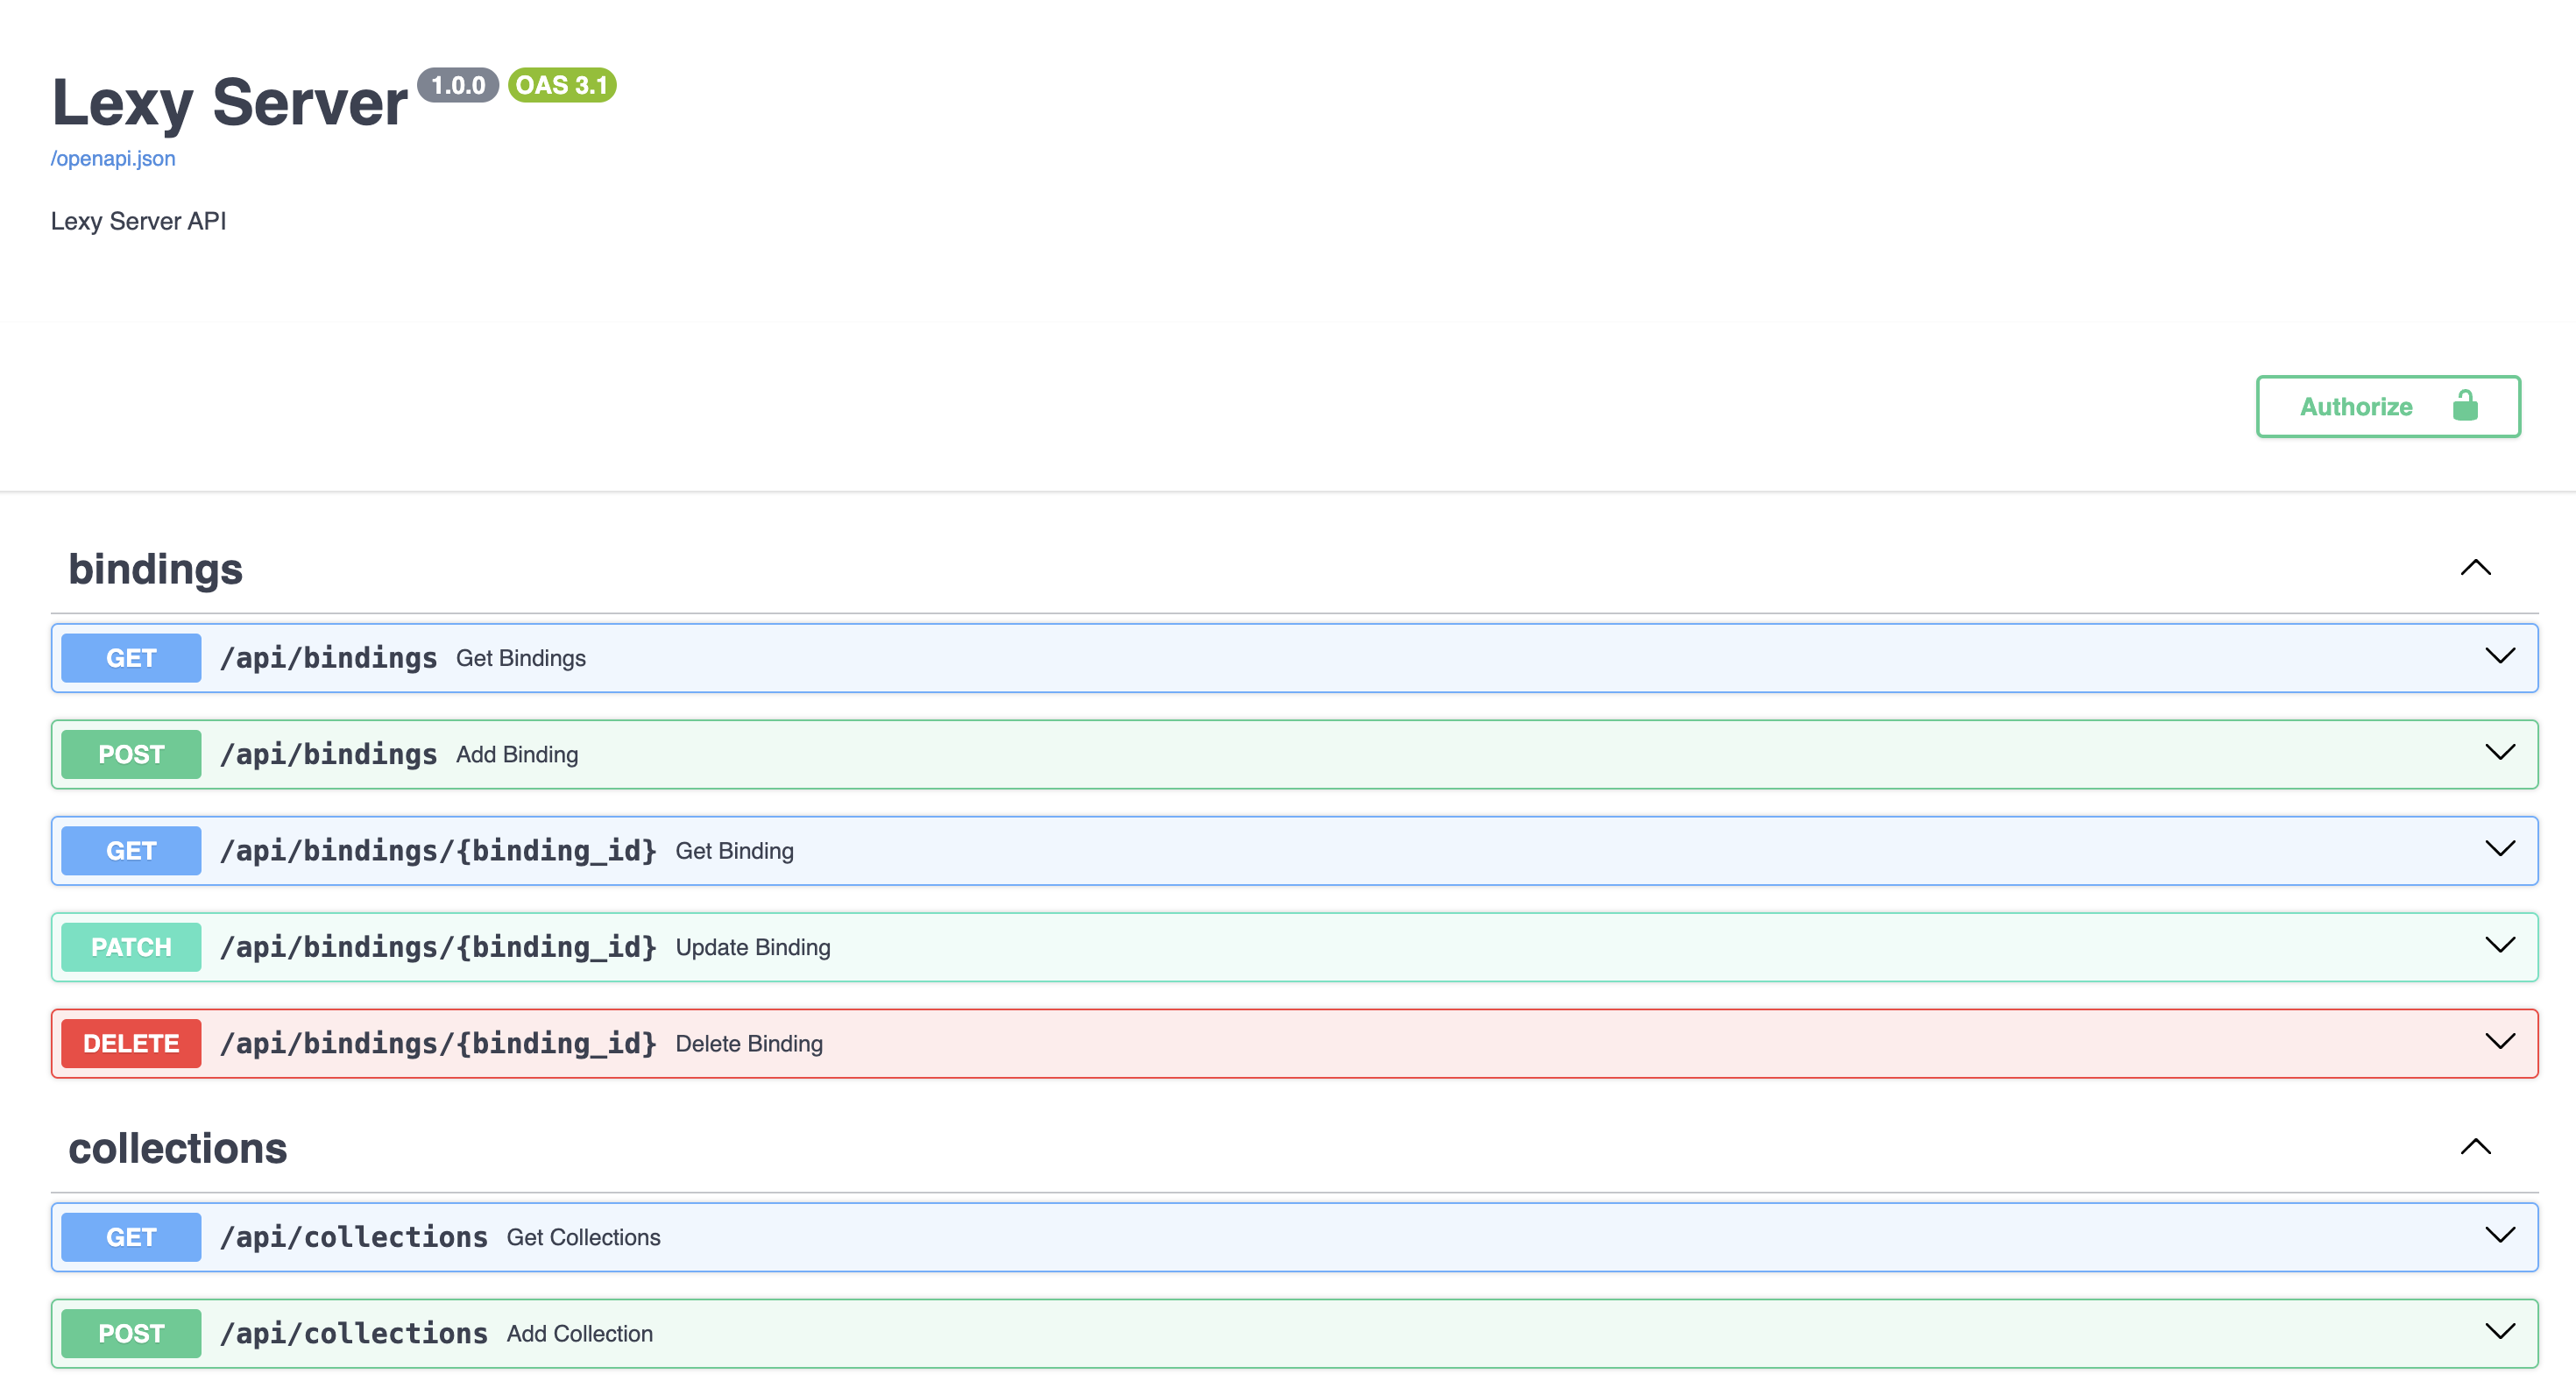
The Lexy server is a RESTful API that provides endpoints for storing and retrieving documents, applying transformations, and managing collections and indexes.
The API is documented using Swagger. You can view the Swagger UI in the
REST API docs or access it locally at
http://localhost:9900/docs when running the Lexy server.
Python SDK
lexy-py is the Python SDK used to interact with the Lexy server.
The SDK provides a LexyClient class that you can use to interact with the Lexy server. Here's an example of how to list
collections using the Python SDK:
For more information on how to use the Python SDK, see the Python SDK reference.